11+ Spring Braided Hairstyles and Tips You’ll Love 💕
Spring is here, and that means it’s time to refresh your look with some gorgeous braided hairstyles. What ever you do even if you’re heading to a picnic, a music festival, or just want to add something special to your everyday style, braids are a perfect choice. They are stylish, practical, and a great way to keep your hair out of your face while still looking amazing.
From my own personal experience, braids are one of the best ways to give your hair a new vibe without too much effort. They work with every hair type, and once you master the technique, you can easily switch up your style depending on your mood. Let’s talk about the beautiful braided hairstyles that are trending this spring, plus some easy tips to help you achieve them effortlessly.
Which one will be your go-to look? Read on, and don’t forget to let me know which one stole your spotlight in the comments. If you’ve tried any of these, share your experience and include your name so others can find you and chat about your favorite styles.
1. Boho Bubble Braid
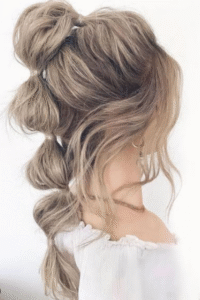
The Boho Bubble Braid is fun, voluminous, and gives you that effortless, carefree look that’s perfect for spring. Unlike traditional braids, this style creates “bubbles” in your hair instead of weaving strands together. It’s a great way to add texture and make your hair look fuller without needing extensions.
What makes this braid stand out is its relaxed, slightly messy appearance. You don’t need to worry about making it too neat, imperfection adds to the charm. It works best on long to medium-length hair, but if you have shorter hair, you can still create smaller bubbles for a similar effect.
How to Style It
- Start by brushing your hair to remove any tangles. This helps create a smooth base.
- Tie your hair into a loose ponytail at the crown of your head or lower, depending on where you want the braid to start.
- Use small hair ties to section off your ponytail every two inches.
- Gently tug on each section to create that “bubble” effect. The more you pull, the bigger the bubbles will look.
- Keep going until you reach the ends, then secure with a final hair tie.
- If you want a boho touch, pull out a few face-framing pieces to make it look more effortless.
Tips to Make It Better
- Use clear or thin elastic bands so they blend into your hair.
- Add small accessories like tiny flowers or beads for a festival-ready vibe.
- If your hair is fine, spray a little texture spray before creating the bubbles to give it more grip.
- This style looks amazing with soft waves, so consider curling your hair lightly before starting.
2. Fishtail Crown Braid

The Fishtail Crown Braid is elegant and romantic, making it a perfect choice for special occasions or even a casual day when you want to feel extra pretty. This braid wraps around your head like a crown, giving you a soft, fairy-tale look. It works beautifully with flowy dresses and floral outfits, making it a go-to style for spring.
This hairstyle works best if you have medium to long hair, but if you have shorter hair, you can achieve a similar look by creating two braids and pinning them together to fake the crown effect.
How to Style It
- Part your hair down the middle and separate it into two equal sections.
- Start a fishtail braid on one side. To do this, take a small piece of hair from the outer edge of one section and cross it over to the opposite side. Repeat on the other side. Keep going until you reach the ends.
- Secure the braid with a hair tie. Repeat the same process on the other side.
- Once both braids are done, wrap them around your head, securing them with bobby pins as you go.
- Tuck in the ends so they blend seamlessly.
- Loosen the braid slightly by pulling on the edges to give it a fuller, softer look.
Tips to Make It Better
- If your hair is freshly washed and too slippery, use a little dry shampoo to add some texture.
- If you want a more polished look, make the braids tighter. If you prefer a relaxed, boho vibe, keep them looser.
- You can curl the ends of your hair before braiding for a softer finish.
- Add decorative pins or flowers to give it an extra springtime feel.
3. Waterfall Side Braid
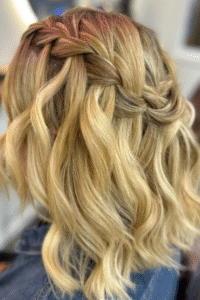
The Waterfall Side Braid is delicate, dreamy, and perfect for those who love soft, romantic hairstyles. This braid gives the illusion of cascading strands of hair, making it look intricate even though it’s surprisingly simple to do. It’s a great way to show off your hair’s natural texture while keeping it partially pulled back.
This style works well on all hair lengths and textures, and it’s especially beautiful on wavy or curled hair.
How to Style It
- Start by parting your hair to one side.
- Take a small section of hair near your temple and divide it into three strands.
- Begin braiding as if you were doing a normal French braid, but instead of pulling all the hair into the braid, let the bottom strand drop, replacing it with a new section of hair from the top.
- Continue this pattern along the side of your head until you reach the back.
- Secure the braid with a small pin or hair tie and tuck it under the rest of your hair for a seamless finish.
Tips to Make It Better
- If you have fine hair, use a volumizing spray before braiding to make it hold better.
- This style looks stunning on wavy hair, so try curling your hair beforehand for extra texture.
- If you want a more casual look, gently pull apart the braid to make it softer and more relaxed.
- For extra detail, add tiny pearl pins along the braid for a chic, polished touch.
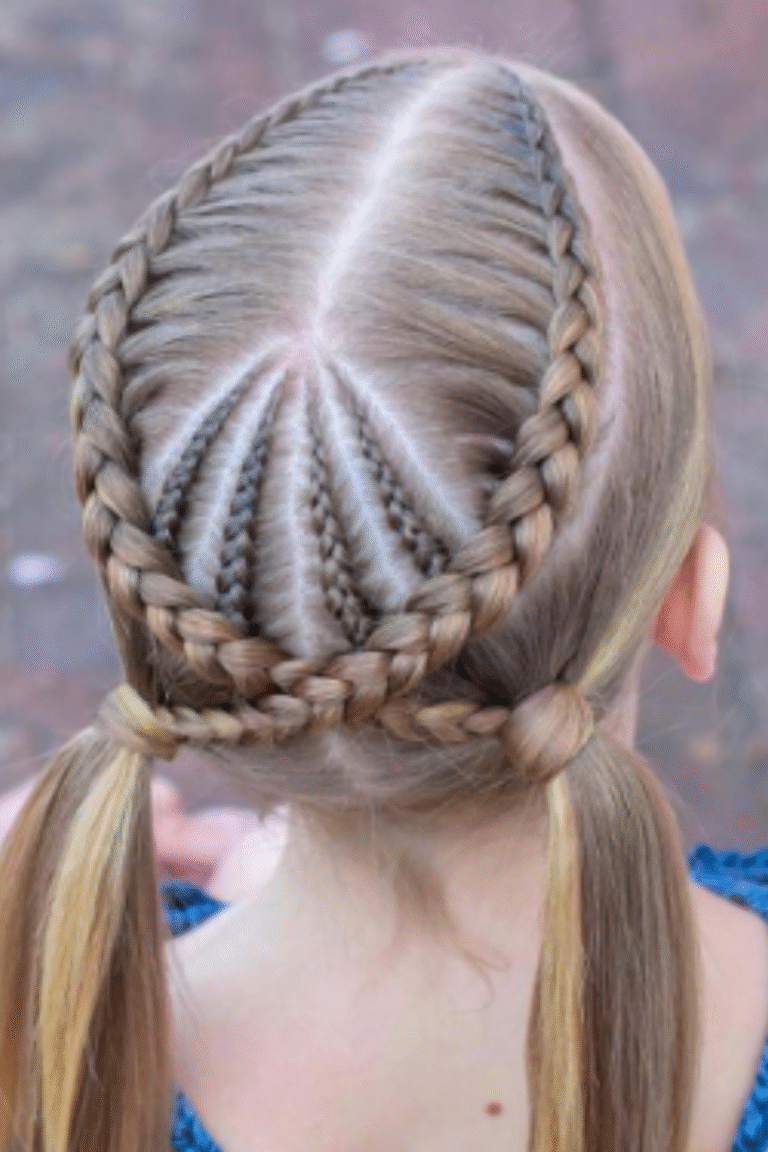
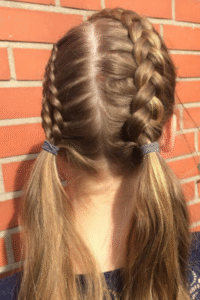
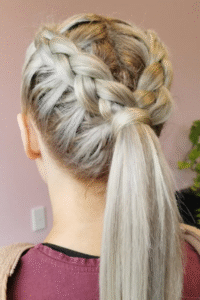
4. Dutch Braid Pigtails
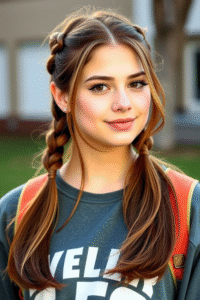
Dutch braid pigtails are making a comeback this spring! This playful, sporty look is both stylish and functional, keeping your hair out of your face while giving you a trendy, youthful vibe. What sets the Dutch braid apart from a regular braid is that instead of weaving the sections over one another, you weave them under. This creates a more pronounced, raised braid that stands out from your hair.
Dutch braid pigtails are perfect for any casual outing, outdoor activities, or when you want to add a bit of edge to your look. This style works best with medium to long hair, but even shorter hair can be adapted into a similar style with the right tools.
How to Style It
- Part your hair down the middle to create two equal sections.
- Starting on one side, take a small section of hair near the top and divide it into three equal pieces.
- Begin braiding the section, making sure to weave the strands under each other instead of over.
- As you braid, continue adding small sections of hair from both sides to keep the braid tight and close to your scalp.
- Once you reach the end, secure the braid with an elastic band and repeat on the other side.
- Gently tug on the edges of the braids to make them fuller and more voluminous.
Tips to Make It Better
- For a more structured, neat look, make your braids tighter.
- If you want a looser, more relaxed style, pull on the braids gently after you finish to give them volume.
- To avoid flyaways, use a smoothing serum or hairspray once the braids are in place.
- This style is perfect for athletic activities, as it keeps hair secure and out of the way.
5. French Braid with Twist
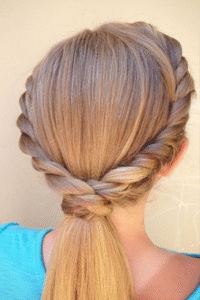
The French Braid with Twist combines the classic French braid with a modern twist (literally). This hairstyle looks intricate but is actually quite simple to create. The added twist gives the braid a fresh update and adds some flair to a traditional look. The French Braid with Twist is perfect for both everyday wear and formal occasions.
The twist element gives it a more structured, sophisticated feel. If you have medium to long hair, this style will work perfectly, but with the right adjustments, it can also look stunning on shorter hair.
How to Style It
- Begin by parting your hair to one side.
- Take a section of hair from the front and divide it into three pieces for a French braid.
- Start braiding by crossing the outside sections over the middle strand, but before you pull the outside sections over, twist them first.
- Twist each side before crossing it over, creating a subtle twist that will add a little more dimension.
- Continue the French braid, incorporating the twists into each new section of hair.
- Finish the braid and secure it with an elastic band. For an extra touch, curl the ends for a bouncy, voluminous look.
Tips to Make It Better
- Make the twists tight for a sleek, polished look or leave them loose for a more relaxed vibe.
- For extra texture and hold, use a texturizing spray or dry shampoo before braiding.
- Add accessories like a pretty hairpin or decorative clip to dress up the style.
- This style is great for both casual and dressy occasions, depending on how you style it.
6. Pull-Through Braid
If you want something that’s simple yet looks complex, the Pull-Through Braid is the perfect style for you. This is a great alternative to the traditional braid, and it’s a fantastic way to create volume and texture without the need to braid every section of hair. The Pull-Through Braid gives a stunning illusion of a braid, but it’s actually a series of tied-off sections that resemble a braid once pulled through.
This style works well on any hair type and length, making it incredibly versatile for everyone.
How to Style It
- Start by pulling your hair into a high ponytail.
- Divide the ponytail into two equal sections.
- Create a small elastic band tie about 2-3 inches down from the top.
- Split the section above the tie and pull the rest of your hair through.
- Continue this process down your ponytail, creating more sections and pulling each one through the previous.
- Once you reach the end, secure the braid with an elastic band. For a softer look, gently tug on the sections to loosen them up.
Tips to Make It Better
- Use clear or matching elastic bands to keep the look seamless.
- If you have fine hair, spray some dry shampoo or texturizing spray before you start to add grip and volume.
- This style is great for a relaxed, casual day or a fun night out.
- For extra glamour, curl the ends of the hair for a chic finish.
7. Messy Top Knot with Side Braid
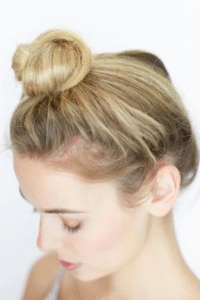
The Messy Top Knot with Side Braid is the ultimate in effortless chic. It’s perfect for when you want to look stylish without spending hours on your hair. The side braid adds a feminine touch to the messy top knot, making this style look intentional without being overly perfect. It’s ideal for days when you want to keep things simple but still look put together.
This style works on any hair texture, and it’s a great go-to look for spring festivals, brunch dates, or even just running errands.
How to Style It
- Begin by creating a side part in your hair.
- On one side, start a small French braid (or a regular braid if you prefer) along the hairline.
- Braid it down to the nape of your neck, and secure it with a small elastic band.
- Gather the rest of your hair and pull it into a loose top knot at the crown of your head.
- Secure the top knot with bobby pins or a large hair tie, and gently pull out pieces to make it look messier and more effortless.
- If the braid is long enough, you can wrap it around the base of the top knot for a more polished look.
Tips to Make It Better
- Use a texture spray before starting to add grip and volume to your hair.
- If you have shorter hair, consider using a small hairpiece or extensions to add more volume to the top knot.
- Make sure to leave a few face-framing strands loose for a more natural look.
- This style works beautifully with both straight and curly hair, so feel free to experiment with different textures.
8. Fishtail Braid
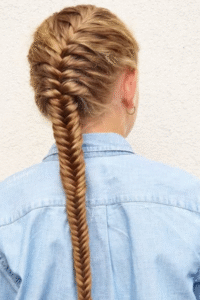
The fishtail braid is one of the most elegant braids you can rock this spring. With its intricate pattern that looks complicated but is surprisingly simple to master, the fishtail braid brings a sophisticated touch to your hairstyle. This style has been a popular go-to for everything from casual day trips to more formal events, and it’s perfect for those who love a little bit of romance mixed with their everyday look.
What sets the fishtail braid apart from other styles is its unique weaving technique. Instead of using three sections like a regular braid, the fishtail braid uses two, making it a little more refined. The result is a chic, woven look that’s perfect for all occasions.
How to Style It
- Start by parting your hair in the middle or to one side, depending on your preference.
- Divide your hair into two equal sections.
- Take a small piece from the outer edge of one section, and cross it over to the other section.
- Do the same from the other side, alternating small sections as you go.
- Continue all the way down to the ends, making sure to keep the sections tight and even.
- Once you reach the end, secure the braid with an elastic band.
Tips to Make It Better
- The fishtail braid can look a bit tight, so gently tug on each section to loosen it up for a more relaxed, boho vibe.
- If you want a bit of volume, tease your hair before you start braiding.
- A fishtail braid works best with medium to long hair. If you have shorter hair, use hair extensions for more length and texture.
- For extra shine, use a lightweight hair serum or oil to finish off the look.
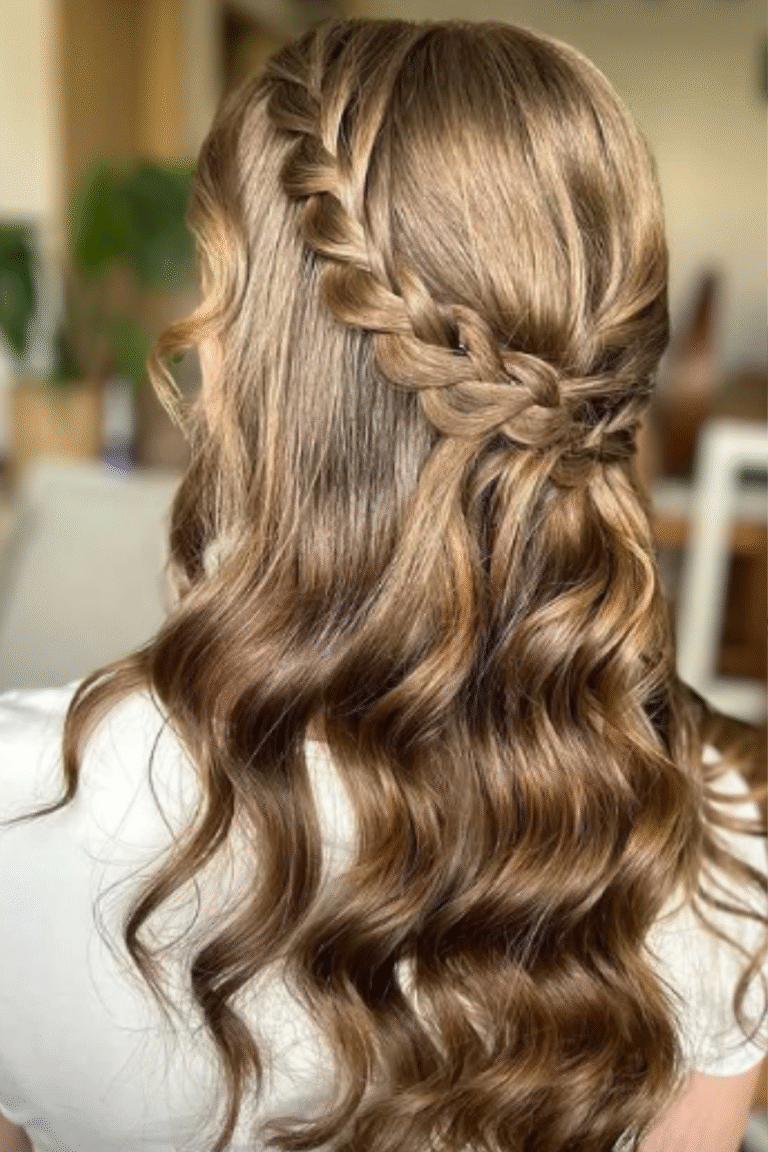
9. Braided Crown
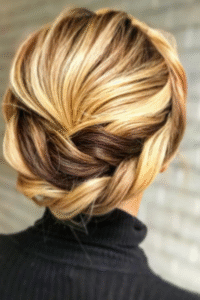
The braided crown is a hairstyle that adds a touch of royalty to your look, giving you an elegant and graceful appearance. This braid goes around your head like a crown, making it perfect for formal occasions, weddings, or when you want to add some glam to your everyday style. What I love most about the braided crown is that it can be dressed up or down. You can make it more intricate for a formal event or loose and boho for a casual day out.
The braided crown works best on medium to long hair, but with a little creativity, it can also be adapted to shorter styles.
How to Style It
- Start by parting your hair down the middle to create two even sections.
- Begin braiding one section from the front of your head, starting just behind the ear.
- Braid across the top of your head and continue braiding all the way to the other side.
- Once you’ve finished one braid, secure it with an elastic band.
- Repeat the same process on the other side of your head.
- Once both braids are in place, bring the ends of the braids around the back of your head and pin them to secure them in place.
- Gently pull the braids apart to give them a fuller look and add volume.
Tips to Make It Better
- Use a dry shampoo or texturizing spray before braiding to give your hair more texture and grip.
- If you want a more relaxed, boho feel, let some hair fall out of the braid to frame your face.
- For a more polished look, keep the braids tight and use bobby pins to secure any stray pieces of hair.
- Add some decorative pins or small flowers to the braids for a more romantic, feminine touch.
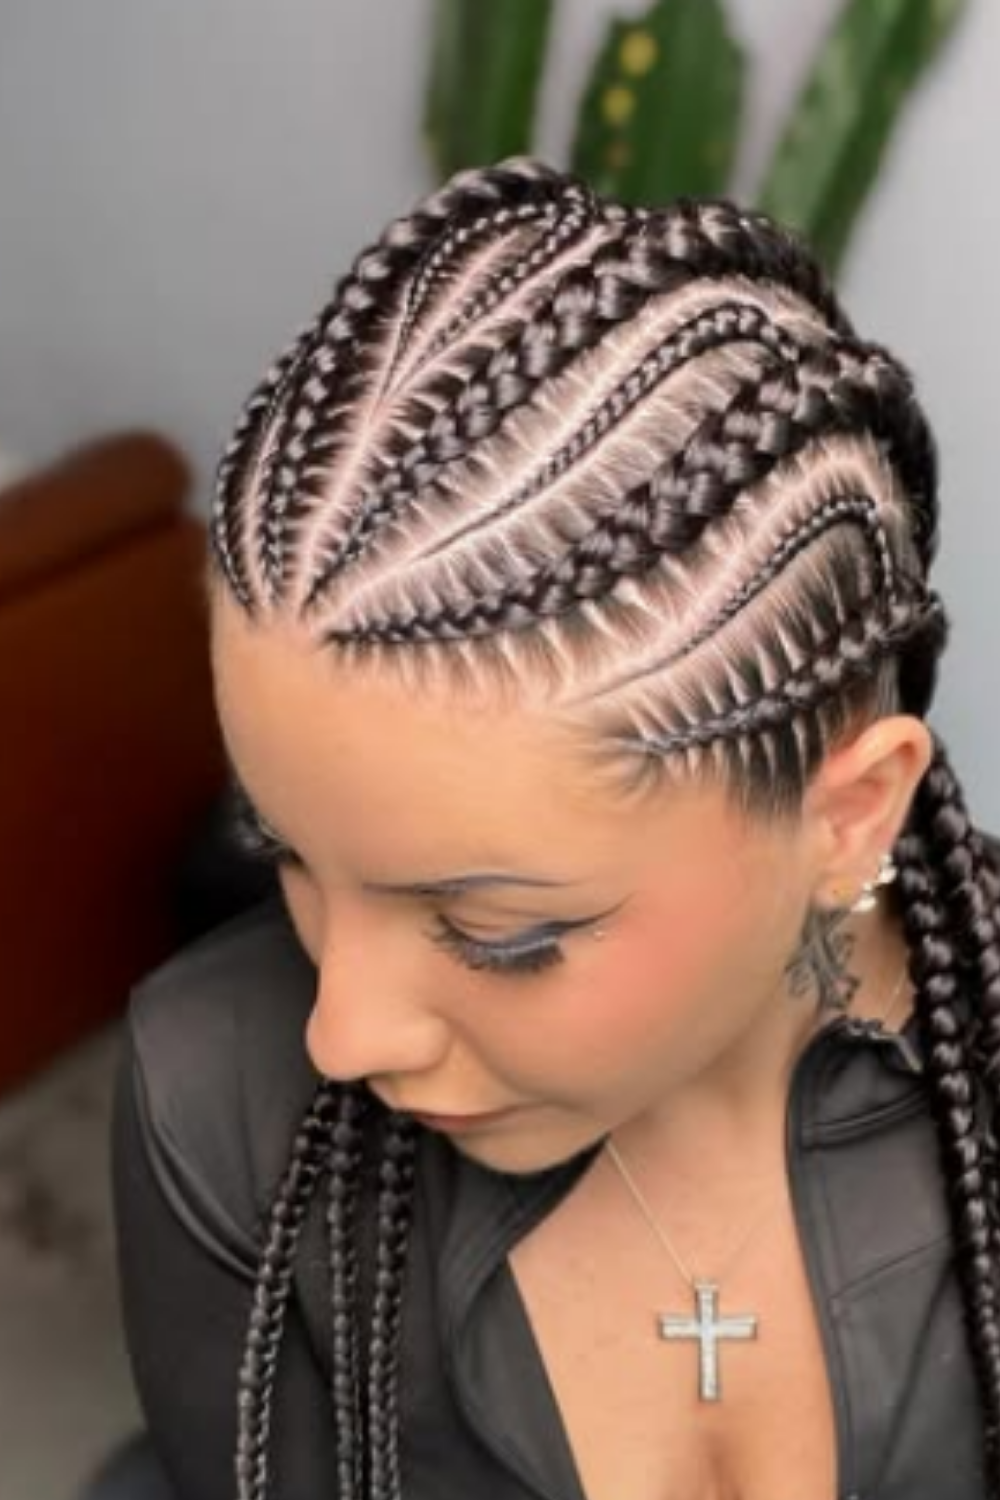
10. Box Braids

Box braids are a classic style that never goes out of fashion. They’re especially great for the spring months when you want a low-maintenance look that still packs a punch. What I love about box braids is their versatility. You can keep them neat and sleek or make them more carefree and boho, depending on the occasion. This style is also fantastic for protecting your hair while still looking cute.
Box braids are perfect for those who want to give their hair a break from constant styling. They’re low-maintenance and easy to maintain, and they can last for weeks, making them a great choice for a springtime protective style.
How to Style It
- Start by sectioning your hair into small, even sections.
- Apply a leave-in conditioner or hair oil to each section to keep it moisturized.
- Begin braiding each section, ensuring that each braid is neat and consistent in size.
- Continue braiding all of your sections, making sure the braids are tight but not too tight to avoid stress on your scalp.
- Once all sections are braided, trim any excess hair or uneven ends.
- You can leave the box braids as they are or tie them up into a bun, ponytail, or half-up style.
Tips to Make It Better
- For extra volume, try using thicker hair extensions, or combine multiple sections of hair into one braid.
- If you prefer a more natural look, go for smaller box braids for a finer, more delicate finish.
- To keep the braids looking fresh for longer, use a satin or silk pillowcase at night.
- Box braids are perfect for adding accessories like beads or charms to make them more unique.
11. Pull-Through Braid Ponytail
The pull-through braid ponytail is a fun and flirty style that adds a bit of texture to your classic ponytail. It’s a great way to update your ponytail while keeping it simple and practical for the spring. This style gives you the look of a braid without actually braiding every section of hair. Instead, you pull sections of your hair through loops to create a braided effect. It’s a quick and easy style that looks complex but is very beginner-friendly.
Perfect for casual outings, brunches, or even a day at the beach, the pull-through braid ponytail is one of those styles that can easily transition from day to night with a little bit of tweaking.
How to Style It
- Start by gathering your hair into a high ponytail and securing it with an elastic band.
- Divide the ponytail into two equal sections.
- Create a small elastic tie about 2 inches down from the top of the ponytail, then split the section above it and pull the rest of the hair through.
- Continue this process down the ponytail, creating small sections and pulling them through each time.
- Once you reach the end, secure the braid with an elastic band and gently pull on the sections to create a more voluminous look.
Tips to Make It Better
- For more texture, apply a texturizing spray to your hair before starting.
- You can also curl the ends of the ponytail for a more polished look.
- To make your pull-through braid more dramatic, try adding hair extensions to increase the volume.
- This style works best with medium to long hair, but you can also try it on shorter hair with a few adjustments.
Final Thoughts – What’s Your Favorite Spring Braid Style?
Spring is the perfect time to experiment with your hair, and braids are the best way to express your creativity. From the stunning fishtail braid to the effortlessly chic pull-through braid, there’s a spring braid style for every personality. Whether you’re attending a formal event or simply want a cute look for a weekend outing, these braided styles will give you endless options.
Which braid stole your heart this spring? Share your thoughts in the comments below, don’t forget to include your name and location! I’d love to know which one you’re planning to try out.

Julia is a fashion enthusiast and style curator at StylishlyAmerican.today, sharing chic, timeless, and effortlessly elegant outfit inspirations. She loves helping women elevate their wardrobes with modern sophistication and classic luxury. ✨👗