10+ Medium Hair Ideas and Tips You’ll Love
When it comes to medium-length hair, it feels like the perfect balance, it’s long enough to experiment with different styles but not too long to require too much upkeep. What ever you do, even if you’re growing out a shorter cut or simply embracing your natural texture, medium hair offers endless styling possibilities. From sleek and polished looks to voluminous waves, medium hair is incredibly versatile, and today, I’ll be sharing amazing medium hair ideas that will have you turning heads. Plus, I’ll share some styling tips to help you make the most out of these looks.
Let me show you how I make the most out of these styles based on my overall experience with different textures and hair types. Whether you’re looking to create a chic office look, something fun for a night out, or just a laid-back beachy vibe, there’s something for everyone in this list. So, let’s jump in.
1. The Messy Beach Waves
One of my all-time favorite looks for medium hair is the beachy waves. This effortless and carefree style never goes out of fashion. It’s perfect for those who want to achieve that natural, windswept look without too much effort. The messy beach wave look is ideal because it adds texture, volume, and life to your hair, making it look like you just walked out of a tropical vacation.
Styling Tips for Beachy Waves
- Start with Damp Hair: If you want to achieve beach waves, always start with damp, towel-dried hair. This will give your hair a bit of texture before you style it.
- Use a Sea Salt Spray: After towel-drying your hair, spritz a bit of sea salt spray to add that beachy texture. It gives your hair that natural, gritty feeling.
- Use a Curling Iron or Wand: I prefer using a curling wand with a 1.25-inch barrel. Wrap sections of hair around the wand for about 5–10 seconds, depending on how tight you want the waves to be. Remember, not every section of hair needs to be curled in the same direction to keep it looking natural.
- Finish with Hairspray or Texturizing Spray: To lock in the texture, finish off with a light hairspray or texturizing spray. This keeps your waves in place throughout the day, without weighing them down.
This style works for pretty much every hair type, whether you have straight, wavy, or even curly hair. The beauty of beachy waves is how adaptable they are! They are ideal for a laid-back, fun day at the beach, or even a more polished evening look if you add a little more volume and definition.
Why You’ll Love It:
From my own personal experience, beachy waves are so easy to maintain. Once you’ve got the texture down, all you need is a little touch-up on the go. Plus, you can dress up or down depending on your outfit, and the waves will always add that perfect touch.
2. Sleek and Straight
When in doubt, go sleek. This timeless look never fails to impress, especially when your medium hair is shiny and smooth. Sleek, straight hair looks polished and sophisticated, making it perfect for formal occasions or even a day at work when you need a bit of extra confidence. The key to nailing this style is getting the right amount of shine and smoothness, which can make all the difference.
Styling Tips for Sleek and Straight Hair
- Prepping Your Hair: Start by applying a heat protectant to prevent any damage from styling tools. It’s crucial if you’re using straighteners or blow dryers.
- Use a Blow Dryer with a Comb Attachment: For the smoothest result, blow-dry your hair with a brush or comb attachment. This helps straighten your hair naturally while preventing frizz.
- Use a Flat Iron: If you want to make your hair super straight, use a flat iron with ceramic plates. Work in small sections to make sure you get the smoothest finish possible.
- Add Shine with Serum: Once your hair is completely straight, apply a small amount of hair serum or oil to add that glossy finish. A serum will tame any flyaways and give your hair that sleek, mirror-like shine.
This look works best on medium hair because it’s long enough to have the straightened effect but not so long that it becomes heavy. The beauty of straight hair is how it can look ultra-glam with minimal effort. Whether you’re attending a fancy event or just need to step up your everyday style, this sleek look will do the trick.
Why You’ll Love It:
This style has always been a go-to for me when I need to look polished without spending too much time styling. From my experience, the sleek and straight style is super easy to maintain. It’s perfect for those who love that clean and fresh look but don’t want to spend hours styling their hair.
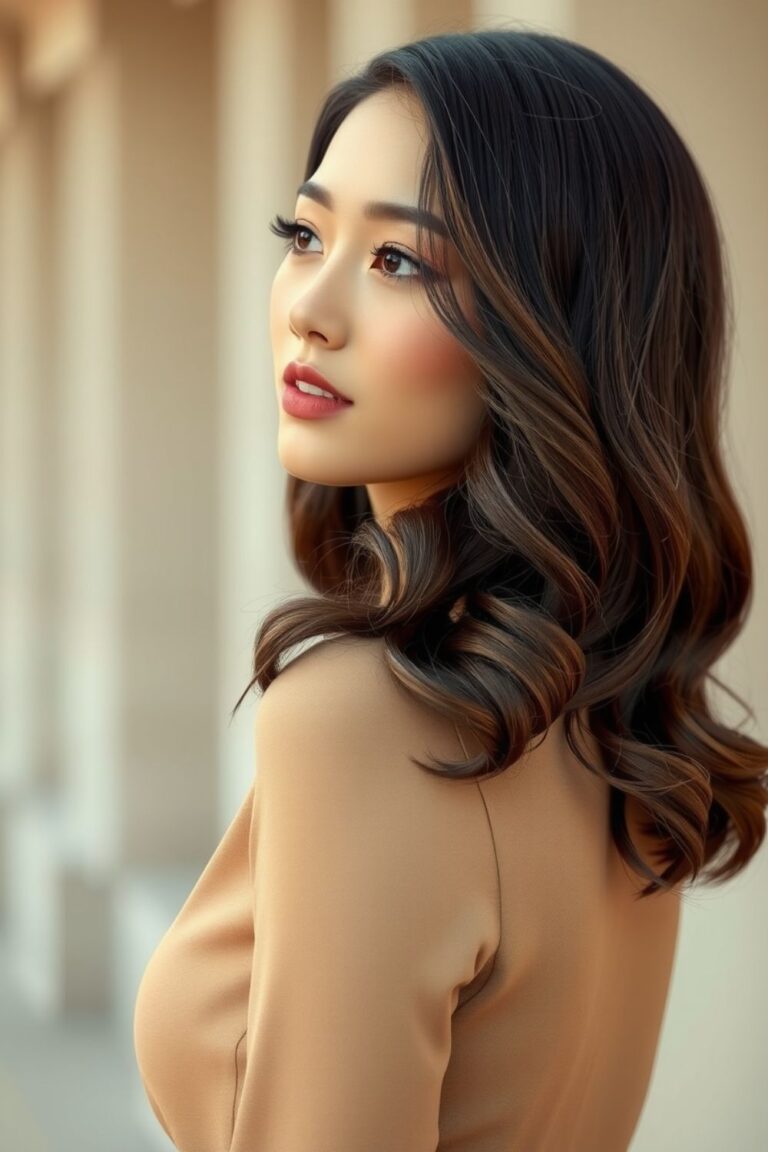
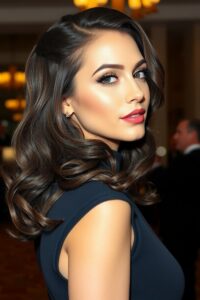
3. The Voluminous Curls
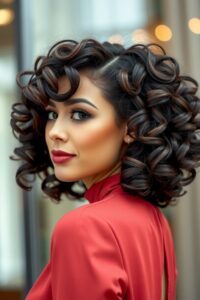
For those who like a little more drama, voluminous curls are the perfect medium hairstyle to try. With big, bouncy curls, you’ll turn heads wherever you go. This look adds both height and volume to medium-length hair, giving it a youthful, playful vibe. Voluminous curls are great for evening events or when you want to feel extra glamorous.
Styling Tips for Voluminous Curls
- Start with Clean, Dry Hair: For the best results, begin with dry hair. Use a volumizing mousse or root-lifting spray to add some texture at the roots. This gives the curls more body and bounce.
- Use a 1-inch Curling Iron: For voluminous curls, I like to use a 1-inch curling iron. When curling, wrap sections of hair around the barrel in a vertical motion to create loose, voluminous curls.
- Pin Your Curls: After curling each section, pin the curl to your head using a bobby pin to set it. Let your hair cool down this way before you release the curls.
- Finish with a Volumizing Hairspray: Once your curls are cooled and set, spray a light volumizing hairspray to keep the curls in place all day long.
This voluminous look works well for medium hair because it creates the illusion of longer, fuller hair. You can also customize the size of the curls depending on your desired level of volume.
Why You’ll Love It:
Based on my overall experience, voluminous curls always make me feel like I’ve stepped out of a beauty magazine. They add so much drama and personality to an outfit, and they’re perfect when you want to make a statement. It’s one of those timeless looks that will never get old.
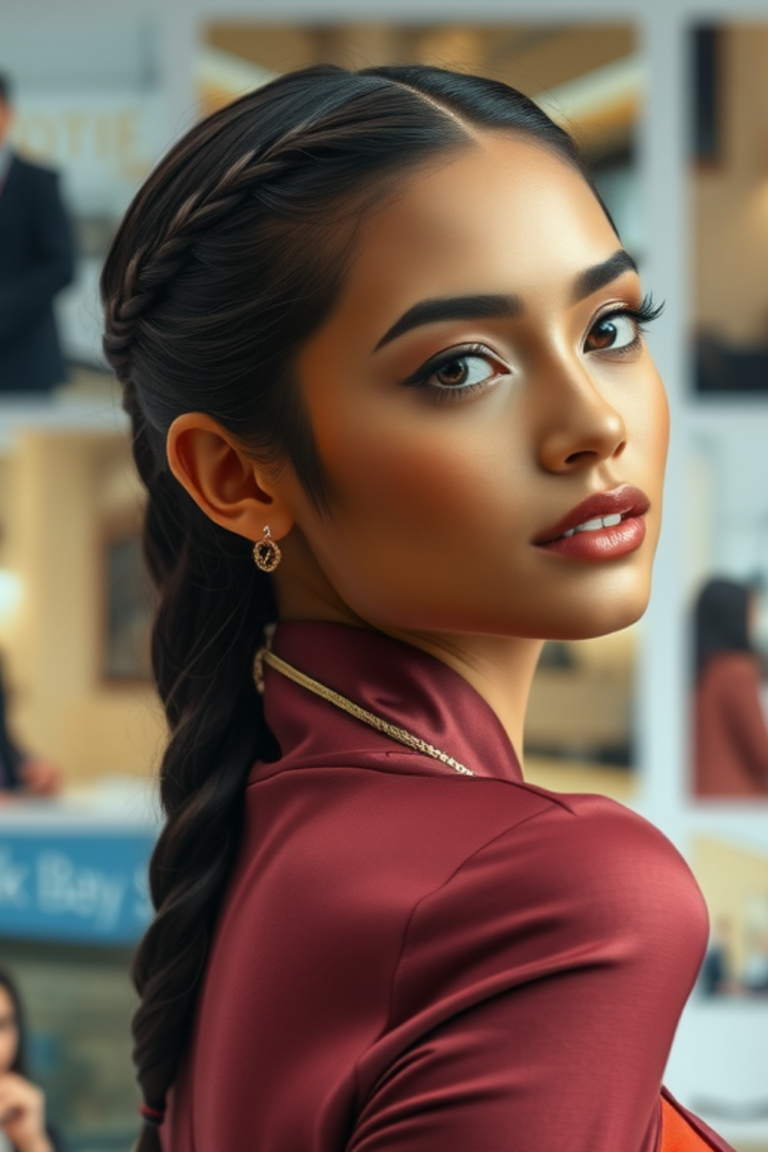
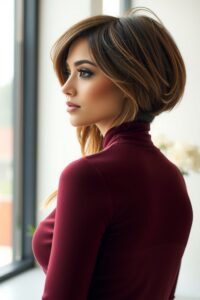
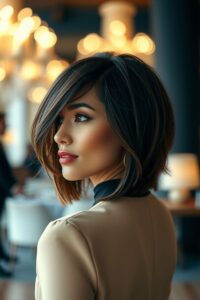
4. The Layered Lob (Long Bob)
The layered lob, or long bob, has been one of the most popular medium-length haircuts for years, and for good reason! It’s a perfect mix of edgy and chic, offering versatility for any occasion. The layers give the hair dimension, creating a textured, effortless style that looks great on almost any face shape. Plus, it’s a fantastic choice if you’re looking to update your look without going too short.
Styling Tips for the Layered Lob
- Start with a Texturizing Mousse: For a layered lob, texture is key. Apply a light texturizing mousse to damp hair to enhance the layers and give them definition. This will help you achieve a more natural, lived-in look without the fuss.
- Blow-Dry with a Round Brush: To add volume and lift, use a round brush when blow-drying. Focus on lifting the roots and smoothing the ends, creating a soft, rounded shape that enhances the layers.
- Use a Flat Iron for Light Waves: If you prefer a more relaxed look, use a flat iron to add gentle waves. Clamp the iron near the roots and twist it slightly as you move down the length of your hair for loose, beachy waves.
- Finish with a Lightweight Hairspray: To keep the layers in place without making them stiff, use a lightweight, flexible hairspray. This allows movement while ensuring your hair holds its shape throughout the day.
The layered lob is great because it’s easy to maintain and always looks fresh. Plus, it’s incredibly versatile, you can wear it sleek for a polished look or add texture for something more casual. I’ve found that this style works well for both thin and thick hair types, giving thin hair the appearance of more volume and thick hair a lightweight, manageable cut.
Why You’ll Love It:
From my own personal experience, the layered lob is one of those styles that looks amazing with minimal effort. It’s perfect for both professional and casual settings, and you can easily add accessories like headbands or clips for a fun twist. It’s the ultimate go-to style for anyone who loves a low-maintenance, high-style look.
5. The Shag Cut
The shag cut has made a major comeback over the past few years, and it’s a great option for those with medium-length hair who want a bit of an edge. This cut is all about layers, think messy, choppy, and effortlessly cool. The shag offers a laid-back vibe but can also be styled to look super chic and trendy. It’s especially great for those with naturally wavy or curly hair, as the layers enhance texture and movement.
Styling Tips for the Shag Cut
- Embrace Your Natural Texture: The shag cut looks best when you embrace your natural texture, so if you have wavy or curly hair, let it shine. After washing your hair, apply a light mousse or curl cream to enhance your natural waves.
- Blow-Dry with a Diffuser: If you want to define your curls or waves, blow-dry your hair with a diffuser. This helps prevent frizz while maintaining the shape and volume of the shag cut.
- Add Volume with a Texturizing Spray: For a little extra oomph, use a texturizing spray to give your hair a lift and define the layers. Focus on spraying it near the roots and the ends to create a tousled, lived-in look.
- Use a Curling Wand for Definition: If your natural texture is a bit more on the straight side, you can use a curling wand to create soft waves throughout your hair. Focus on the mid-lengths to ends for that shaggy, carefree vibe.
The shag cut is perfect for those who want a bold yet effortlessly cool style. Whether you’re hanging out with friends, running errands, or heading to a night out, the shag adds a rock-and-roll edge that’s impossible to ignore.
Why You’ll Love It:
The shag is ideal if you’re looking for a style that’s both low-maintenance and full of personality. Based on my overall experience, it’s a great cut if you don’t want to spend too much time styling but still want your hair to look fabulous. It’s one of those cuts that feels like it fits perfectly into any lifestyle.
6. Soft Curls with a Side Part
For those who love curls but want something a little more polished, soft curls with a side part offer a gorgeous, feminine look. This style is all about voluminous curls that are soft and bouncy, without being too tight or overdone. Pairing the curls with a deep side part adds a touch of elegance, making this style perfect for both casual and formal occasions.
Styling Tips for Soft Curls with a Side Part
- Apply a Curl-Enhancing Cream: Start by applying a curl-enhancing cream or mousse to damp hair to give your curls structure and definition.
- Use a Curling Iron with a Larger Barrel: For soft curls, choose a curling iron with a larger barrel (around 1.5 inches). Wrap sections of hair loosely around the barrel, leaving the ends free for a more relaxed, voluminous curl.
- Create a Deep Side Part: Once your curls are done, create a deep side part. This adds extra volume at the roots and creates a more sophisticated, dramatic look.
- Finish with a Light Hairspray: Set your soft curls with a light, flexible hairspray to hold the curls without making them crunchy or stiff. This ensures the curls last all day while still looking natural.
Soft curls with a side part give you a polished, glamorous look that works for almost any occasion. Whether you’re going out for a dinner date or attending a wedding, this style will elevate your look and leave you feeling confident.
Why You’ll Love It:
From my experience, this is one of those looks that makes you feel instantly more glamorous. It’s not too much, but it’s enough to make you stand out in a crowd. It’s easy to achieve and maintain, and it always looks beautiful no matter the occasion.
7. The Textured Pixie Cut
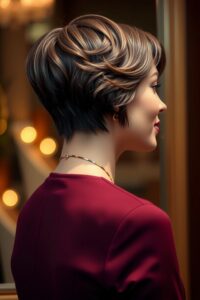
Let’s talk about the textured pixie cut, a bold and edgy option for anyone looking to change up their medium-length hair. This cut is short but still has enough length to give you styling options. The pixie is all about texture, layers, and that cool-girl vibe create more volume and texture, giving you that effortless, lived-in look that the pixie cut is known for.
Styling Tips:
- Texturizing Spray is a Must: A light texturizing spray can help bring out the choppy layers of your pixie cut and add body to the hair. Focus on the roots for volume and the tips for separation, which will highlight the cut’s shape.
- Use a Flat Iron for Defined Pieces: For a more defined look, use a flat iron to straighten certain sections of your pixie cut. You can also curl the ends slightly to create more movement and definition.
The textured pixie cut is a bold and empowering look that is perfect for those who want something fresh, modern, and chic. It’s low-maintenance but still makes a major style statement.
Why You’ll Love It:
Based on my overall experience, the textured pixie cut is liberating. It takes away the hassle of long hair but still allows you to have a fun, playful vibe. It’s a perfect choice if you want to stand out and keep things easy. Plus, it works wonders for highlighting your facial features, making it a great option for people who love to experiment with edgy styles.
8. Classic Beach Waves
You can never go wrong with classic beach waves. This style has remained timeless because of its ability to look both relaxed and effortlessly chic. Beach waves are perfect for medium-length hair because they give your hair volume and texture without requiring too much upkeep. Whether you have straight, wavy, or curly hair, beach waves work beautifully for all hair types, making them one of the most versatile medium-length styles.
Styling Tips for Classic Beach Waves
- Start with Salt Spray: For that perfect beachy texture, apply a sea salt spray to damp hair. This will enhance your natural waves and provide a bit of grip, making it easier to style.
- Use a Wand for Loose Waves: A curling wand works best for creating soft, undone beach waves. Take random sections of your hair and wrap them loosely around the barrel. Hold for just a few seconds before releasing to avoid tight curls.
- Don’t Overdo It: To keep the look casual, avoid curling every section of hair. Leaving some pieces straight adds to the natural, beachy vibe of the style.
- Finish with a Light Hairspray or Texturizing Spray: Once your waves are in place, finish with a light mist of hairspray or texturizing spray to set the style without making it stiff. This will keep the waves bouncy and flexible all day.
Beach waves give you that perfect mix of laid-back and chic, making it an ideal look for both summer days and cozy winter nights.
Why You’ll Love It:
From my own personal experience, beach waves are one of the easiest ways to make medium-length hair look effortlessly stylish. This style works great for days when you want to look put-together without spending too much time. It’s perfect for when you want to look polished but not overdone.
9. The Side-Swept Bob
The side-swept bob is an elegant and timeless medium-length style that will always be in fashion. This haircut is a little longer than a traditional bob but still has enough structure to feel fresh and modern. What sets the side-swept bob apart is the way it angles towards one side, offering a flattering silhouette that frames the face beautifully. It’s great for those who want a sophisticated look with a touch of edge.
Styling Tips for the Side-Swept Bob
- Blow-Dry with Volume: Use a round brush when blow-drying to lift the roots and give your bob extra volume. This will help create the perfect side-swept shape, giving your hair an elegant curve that flatters your face.
- Use a Flat Iron for Sleekness: To keep the bob looking polished, use a flat iron to smooth out any frizz or waves. The sleek texture of the side-swept bob will really shine when your hair is straight and well-maintained.
- Apply a Shine Serum: For added shine and a silky smooth finish, apply a small amount of shine serum to the ends of your hair. This will give your bob a glossy, healthy look that elevates the style.
The side-swept bob is an effortlessly chic hairstyle that works for any occasion, whether you’re at work or out on the town.
Why You’ll Love It:
From my own personal experience, the side-swept bob is perfect for those who love a polished look but don’t want the maintenance of a super short haircut. It’s versatile enough to wear both casually or formally and gives you a sophisticated, yet approachable vibe.
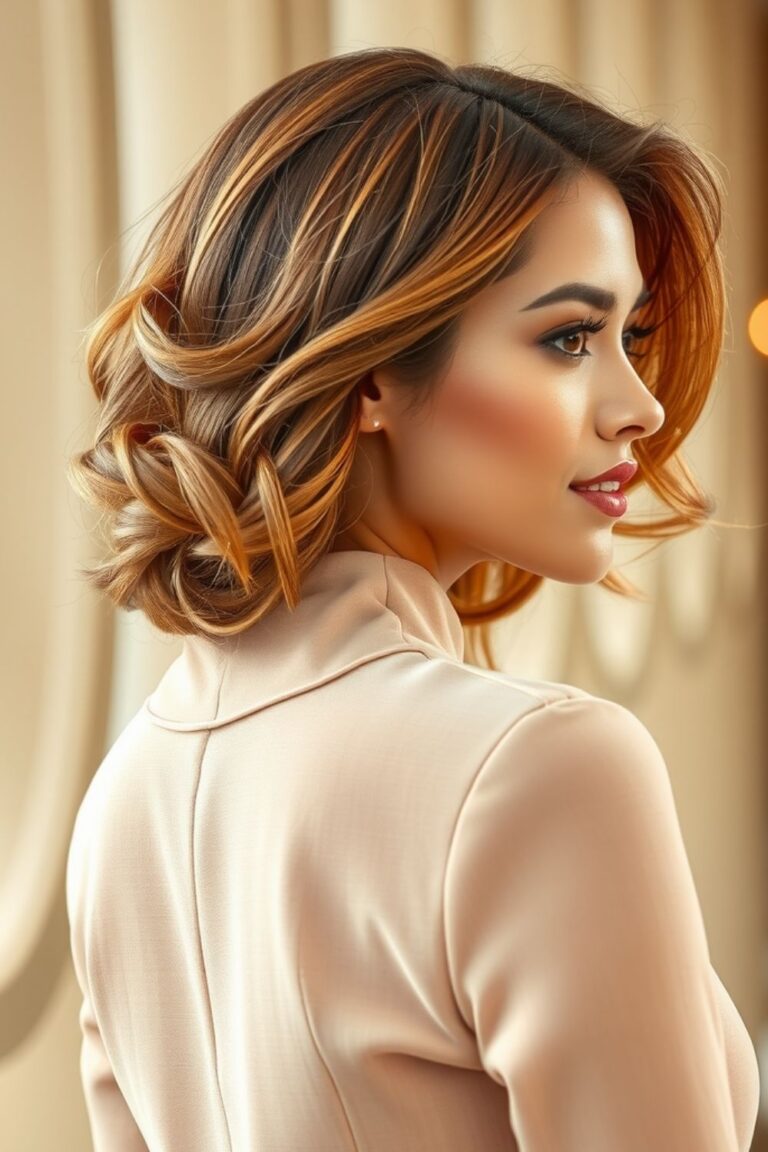
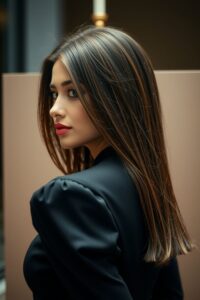
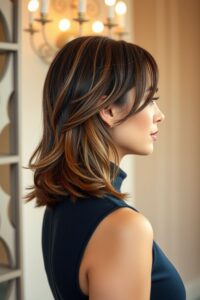
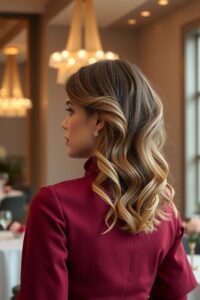
10. The Curled Lob with Highlights

For an extra dose of style, the curled lob with highlights is a show-stopping combination. The lob itself is a versatile cut that can easily be transformed by adding some curls and subtle highlights. The curls give the hair volume and texture, while the highlights brighten up the look and give it dimension. This style is perfect for adding some flair to your medium-length hair without going too bold.
Styling Tips for the Curled Lob with Highlights
- Curl Your Hair with a Large Barrel Curling Iron: To create soft, voluminous curls, use a large barrel curling iron. Take 1-inch sections of hair and curl them away from your face, leaving the ends slightly straight for a relaxed look.
- Highlight Strategically: If you want to add highlights, focus on the areas that catch the most light, usually the front pieces around the face. This will add depth and make your curls stand out.
- Use a Leave-In Conditioner: To keep your hair hydrated and shiny, apply a leave-in conditioner before styling. This will give your curls extra bounce and shine, keeping them soft throughout the day.
- Set with a Flexible Hairspray: To maintain the soft curls and highlights, finish with a light, flexible hairspray. This will help keep your curls bouncy without weighing them down.
The curled lob with highlights is the perfect way to bring out the best of both worlds, a chic bob and gorgeous, voluminous curls. It’s perfect for those who want a little extra drama with their everyday hairstyle.
Why You’ll Love It:
From my experience, this is the perfect hairstyle for anyone who wants to add more depth and texture to their medium-length hair. The curls and highlights combine to create a stunning, eye-catching look that’s both fun and elegant.
Engage with Me!
Have you tried the curled lob with highlights? What’s your go-to highlight style? I’d love to hear your experience with it, so be sure to leave your name and location in the comments. Let’s share tips and tricks to get this beautiful, sun-kissed look.
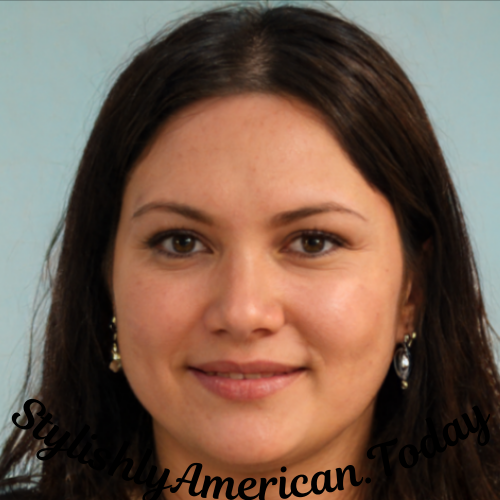
Julia is a fashion enthusiast and style curator at StylishlyAmerican.today, sharing chic, timeless, and effortlessly elegant outfit inspirations. She loves helping women elevate their wardrobes with modern sophistication and classic luxury. ✨👗